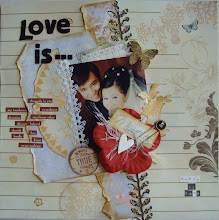
Hello again! Here's another edition from my album crazed period! Hee hee!
This is an album made entirely from paper bags. Yup, paper bags! Interesting huh?! I first saw this lady on YouTube doing this. I think its luvleescrappin. Anyway, if you cannot find it, just type in paper bag albums and there will be a whole lot of videos! (However, there are a few crappy ones you have to sift through first before you can find the nice ones!)
Ok, here's the cover. Nothing to it really. Especially to those of you experienced scrappers. The interesting parts come when you see the binding and the way the paper bag can fold in and out to reveal hidden parts!
When the album opens up, there will be pockets to hold extra photo mats or tags or whatever you wish to put in.
Ok, let's see if I can put it into words!
Step 1 : Get paper bags that have a "base". Don't get the flat ones that cannot open up at the base.
Step 2 : Open the bags up fully. The sides are all pushed out and pressed out. That way you get the flap that you see right below here! This page flips DOWN.
Step 3 : Since the bag will open up to have both right and left flaps, the other flap is folded to the BACK of the page, shown below here (Left side of album). This page here will flip UP.
Therefore, the right page shown here will be the one that flips DOWN.
Step 4 : Repeat this with every page and you can have as many pages as you have paper bags!
Step 5 : What you see here are 6 paper bags worth.
Step 7 : Remember that the paper bags have a base? Well that base is also pushed out backwards and that will be your binding.
Step 7 : Join all the back flaps together and you will get your completed album!
You don't even need to decorate every page before you glue. Just get your paper bags together and you can take your time to decorate the pages!
Here's the binding. I didn't quite like the paper back showing so I used packing tape to tape the ends so the paper bags cannot be seen. If you are neat and can get the pages well lined up, then you can afford to let the bindings be seen. I kinda misaligned a few pages and I gave up trying to make it look nice!
Enjoy!
PS : I used carton boxes for the cover to make it look sturdier. You can try cardboard, chipboard or even canvas cover! Get your canvas covers from Daiso!


No comments:
Post a Comment